Supercharged TR6

Basic installation specs: Triumph TR6 2.5L engine, 7.75:1 compression, ported and polished head, electric clutched Eaton M62 supercharger (Mercedes C230), Integral Stage 1 supercharger cam, cam bearings, lightened flywheel, deep sump w/windage tray, 6 groove serpentine belt, 105A GM alternator, Cadilac Northstar V8 harmonic balancer, custom water pump pulley, homemade intake manifold with 19lb injectors, 2 bar MAP sensor, Ford 5.0 throttle, GM sensors, TEC3 engine management computer.

The goal was to have the supercharger up and running in time for the British Invasion car show in Stowe Vermont in mid September 2005. We made the drive to the show but the supercharger was along for the ride only much like a belt idler. No time to work out the bugs and get it tuned before making the 250 mile journey. Matter of fact when we headed for Vermont the car only had about 25 miles in the new installation of a rebuilt motor, rebuilt transmission, addition of overdrive, and the supercharger. The trip went well (not counting running rich) with no failures but I kept wondering just what I may have forgotten to tighten!

The supercharger clutch is now controlled by a rocker switch located where the choke knob used to be. The car runs just fine without using the supercharger as it draws air thru the 1.25″ bypass hose and the S/C windmills at higher engine speeds. Eventually the clutch will also be automated by a Hobbs switch and timer. I was a bit disapointed by the loud howl of the supercharger. Maybe I’m getting used to it but of course it only makes noise when engaged and then you are busy going fast. Really fast! It’s like a shot of nitrous when running on six or seven pounds of boost. Can’t tell you how pleased I am with the performance.

It’s now nearing the end of September 2005 and I am working on fine tuning. It is running a tad lean on boost so that must be corrected for optimum power and to keep from melting a piston. Once it is running well at all speeds I will have it dynoed. Hoping for 200HP and by the feel it must be very close already. Still need to install the donated Audi intercooler. Looks like over the winter it will be converted over to Corvair rear axles, and time permitting this Fall new single pipe exhaust, perhaps a Z car limited slip differential too.

August 2005

Front view with the engine in the car. It’s a very tight fit but so far so good. The 6 groove serpentine belt is in place in the photo. Next up is to fit the intercooler and bypass valve.

Driver’s side view of the engine bay. Wires at the supercharger are for the it’s electric clutch. Aaron Cropley has worked tireslessly on the underhood harness. He’s really done a great job.

September

Things are getting even tighter with the installation of the crossmember. The radiator is at the prestigeous Topsham Radiator shop getting the lower outlet replaced with a 1.25″ copper elbow. Just like the rest of the installation it will be a close fit with the lower radiator hose going over the top of the 105 amp GM alternator to the new elbow.

Looking from the driver’s side you can see the radiator installed and the K&N air filter out front that has since been replaced with a smaller K&N oval shaped filter.

The installation is nearly complete in this photo. The intercooler has not been fitted but can be done later. On the passenger side of the input tubing is a large polished aluminum bypass valve that will return excess boost to the underside of the air cleaner tubing. In the photo the bypass valve is installed backwards causing the S/C tubing to blow apart on decelleration. Correcting the valve and changing to heavy duty spring loaded clamps solved the problem. Update: The problem was not completely solved by these changes.

October

October 1, 2005. Here it is October in Maine and time to park a TR6 is in sight! A new set of wheels and tires should arrive any day now. There are a few supercharger issues yet to be resolved. None of them are unsurmountable but all take time. In order of priority this is what’s left to do.

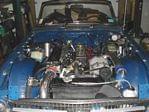
Fix: To add a large capacity blow off valve. 50mm Valve

blow off

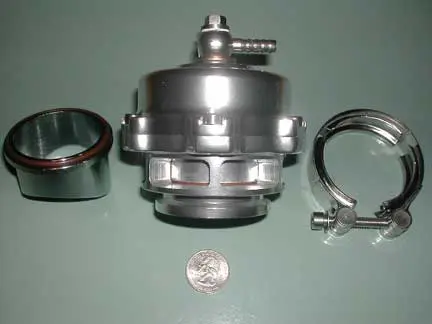
Fix: Turn around the valve so boost tries to close the valve.

Fix: Add a Hobbs switch to engage the clutch when accelerating hard. Also add an adjustable timer that will keep the clutch engaged for say 15 seconds after the Hobbs switch wants to drop out the clutch. The timer is important so the clutch doesn’t drop out between shifts.

This new valve has solved the nagging issue of the tubing blowing apart on sudden decelleration! Tonight for the first time I could run through the gears without wondering just when the tubing would seperate. If this hadn’t worked, the next step was to move the throttle to the intake side of the supercharger. When installing the valve I nicked a radiator tube and had a new leak to repair. Maybe it is time to put the car away for a few months.